

Hi Beauties,
At Ballet Beautiful we love to use a resistance band in many ways to achieve a quicker tone. Below, our Ballet Beautiful NYC Master Trainer Nicholas shares some of his favorite moves that incorporate this versatile accessory.
We prefer a looped resistance band, but if that’s not available to you, you can always use a standard long TheraBand and create a loop by tying it at the ends. Keep in mind that if you’re creating your own loop, you want to tie it tightly so that the band does not snap back! As always, please use caution when using any accessories in your workouts.
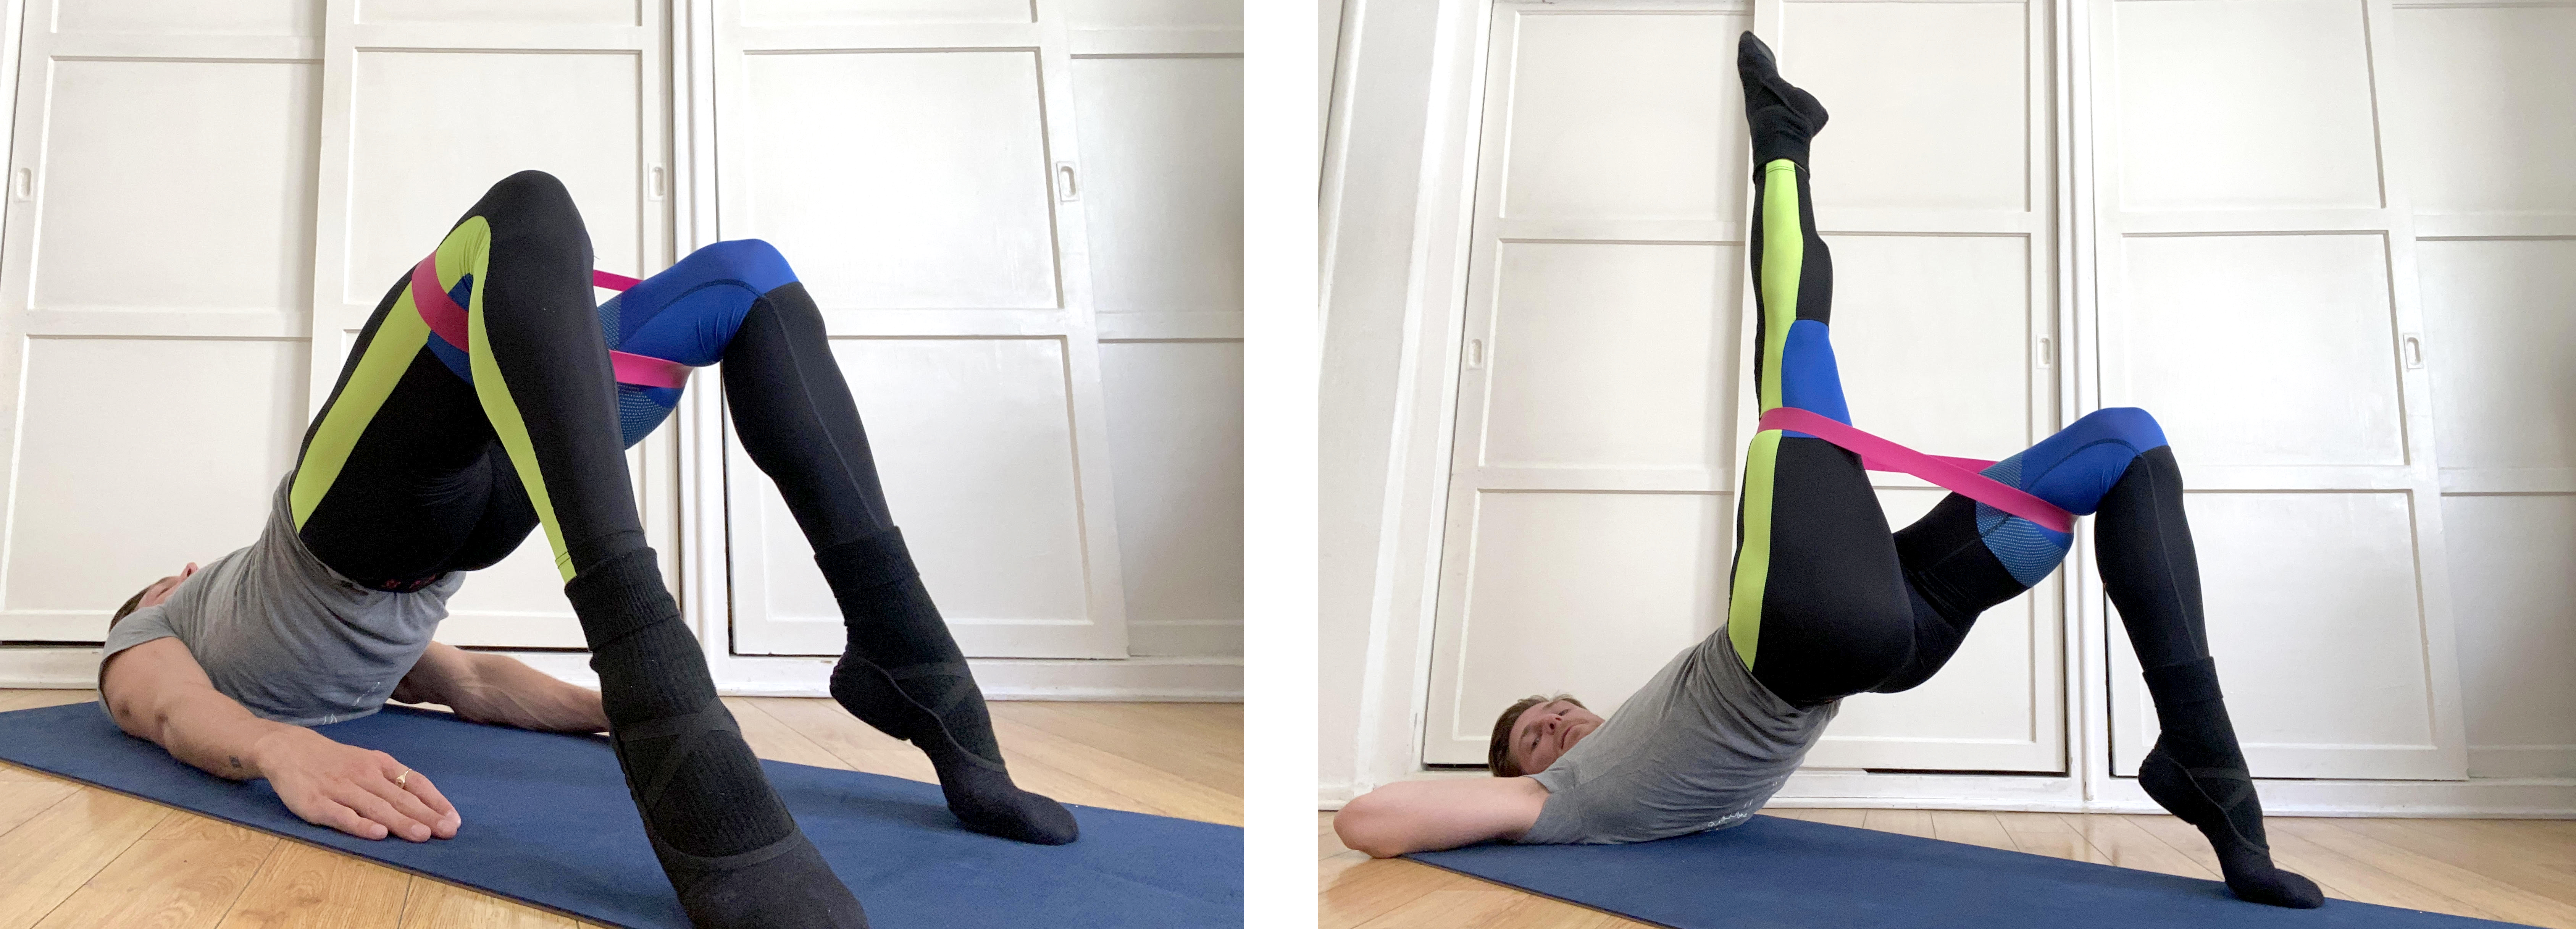
Bridge
You can use a band to create more resistance in any bridge series workout. You’ll get a quicker burn in your glutes when you use your band. Place both feet between the band, pulling the band up to above the knee/lower part of your thigh. When using a band in our basic bridge position, in which your legs open to a hip-width distance and both feet are parallel, try to keep the distance consistent in the neutral position. The band is going to try to bring your knees together but fight that resistance as best as you can! You can also use the band in different bridge positions like opening your legs to mat-width distance, sliding your legs down the mat to an extended bridge with both knees and feet together, or in one-leg bridges. Just remember to keep your form in any of these variations of the bridge move!
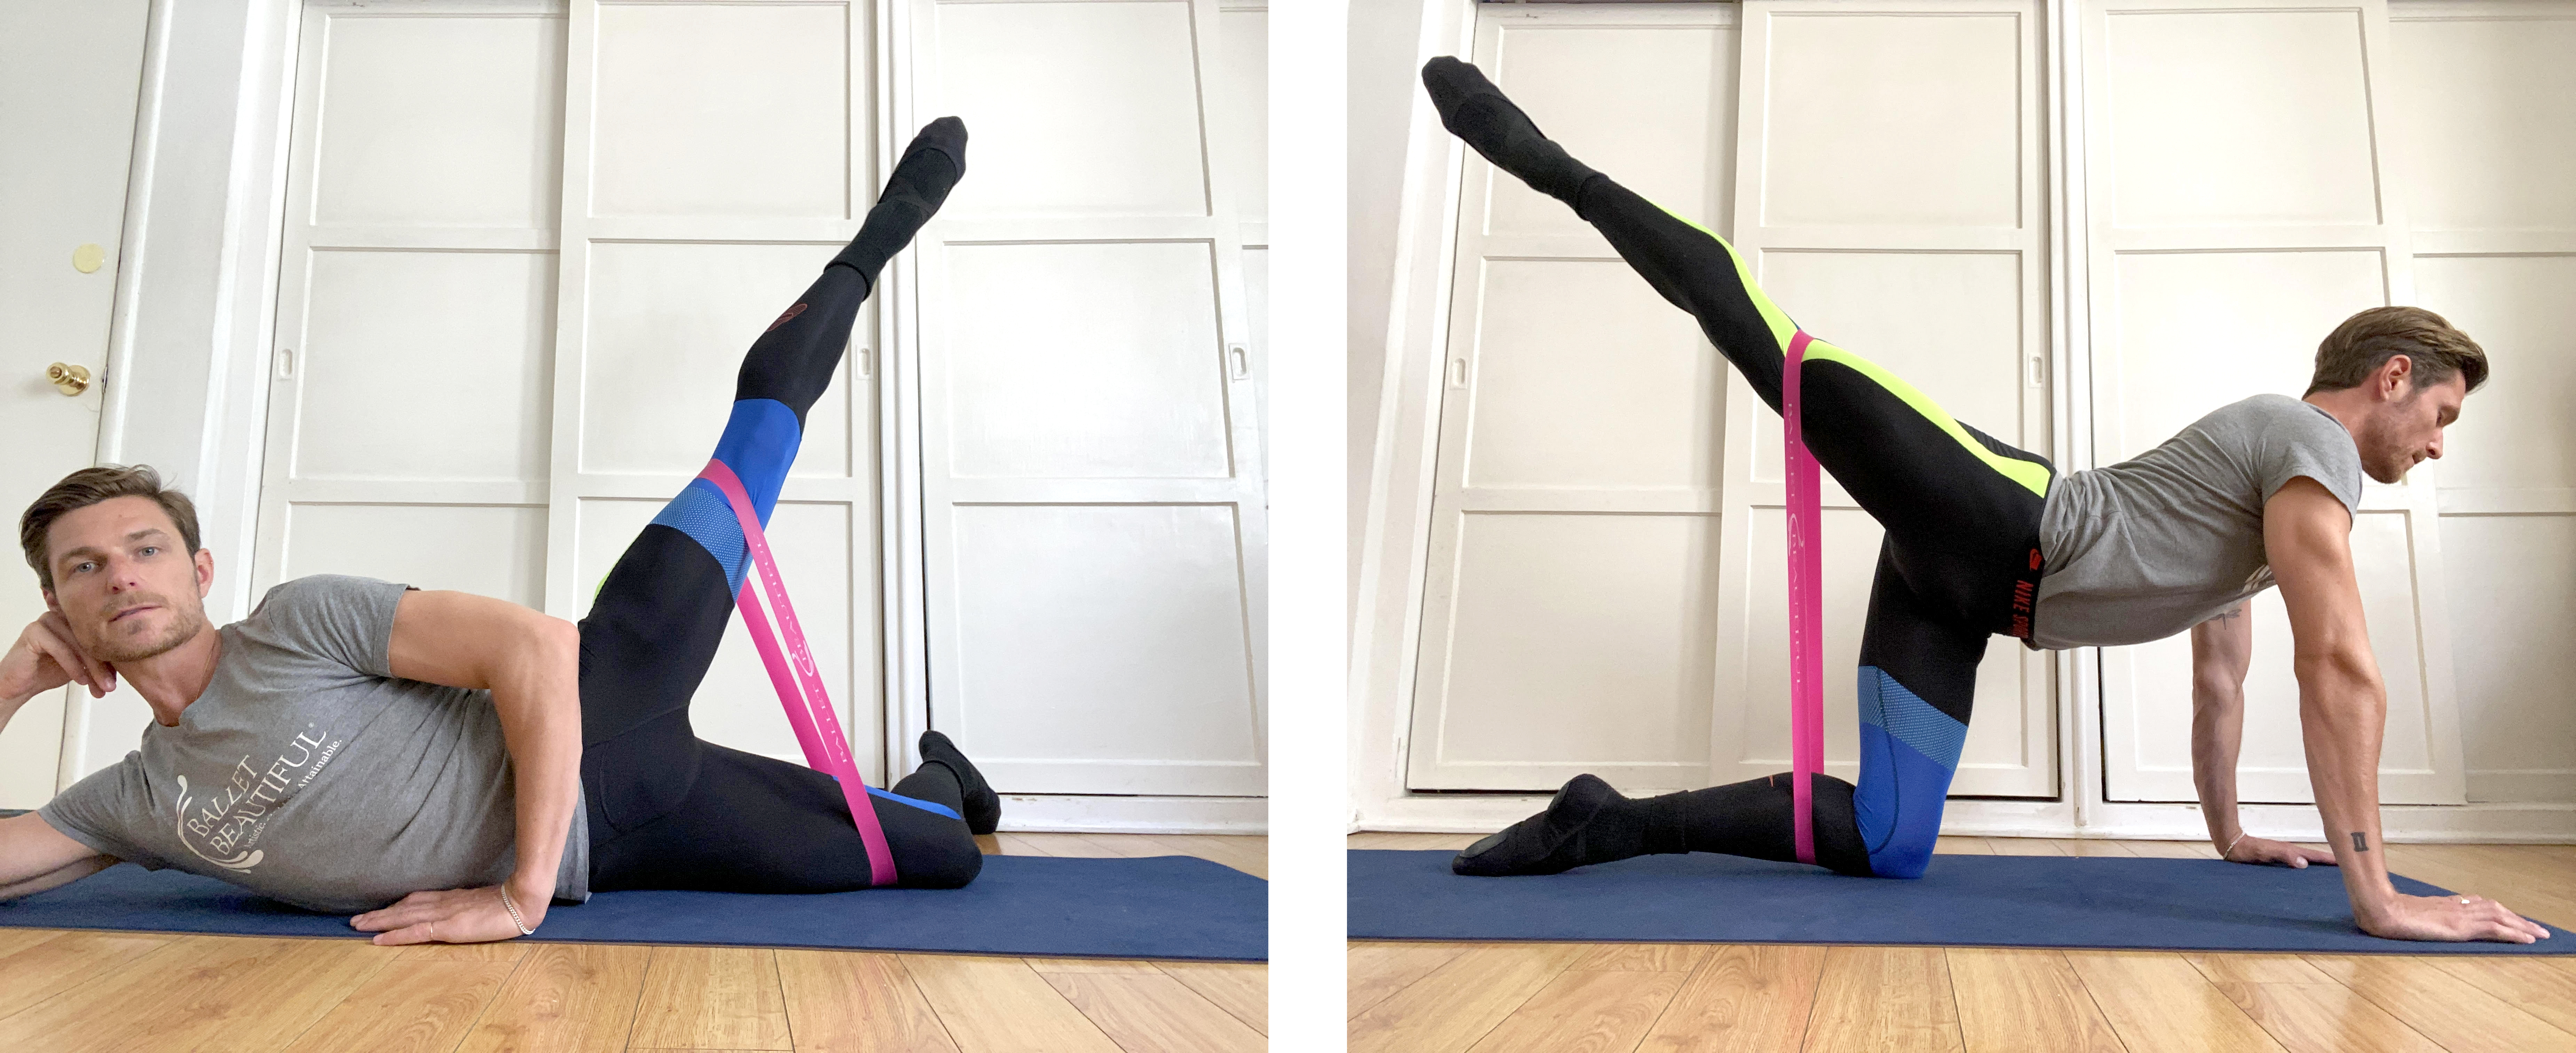
Outer Thigh
If you want a more challenging outer thigh exercise, try incorporating a resistance band. Place both feet through the band and settle it above the knee or lower part of the thigh. Laying down on one side, start with your working leg in your extended parallel position. Lift your leg and keep it in neutral. You’ll see that your leg will not be able to go as high as you’re used to because of the resistance of the band. Try not to let your leg slam back down to the mat! Use that tension to slowly lower your leg down to the mat instead. Again don’t let the use of the band affect your form. Keep your hips stacked one on top of the other, keep your core engaged and don’t allow your weight to rock backwards in order to lift your leg higher.
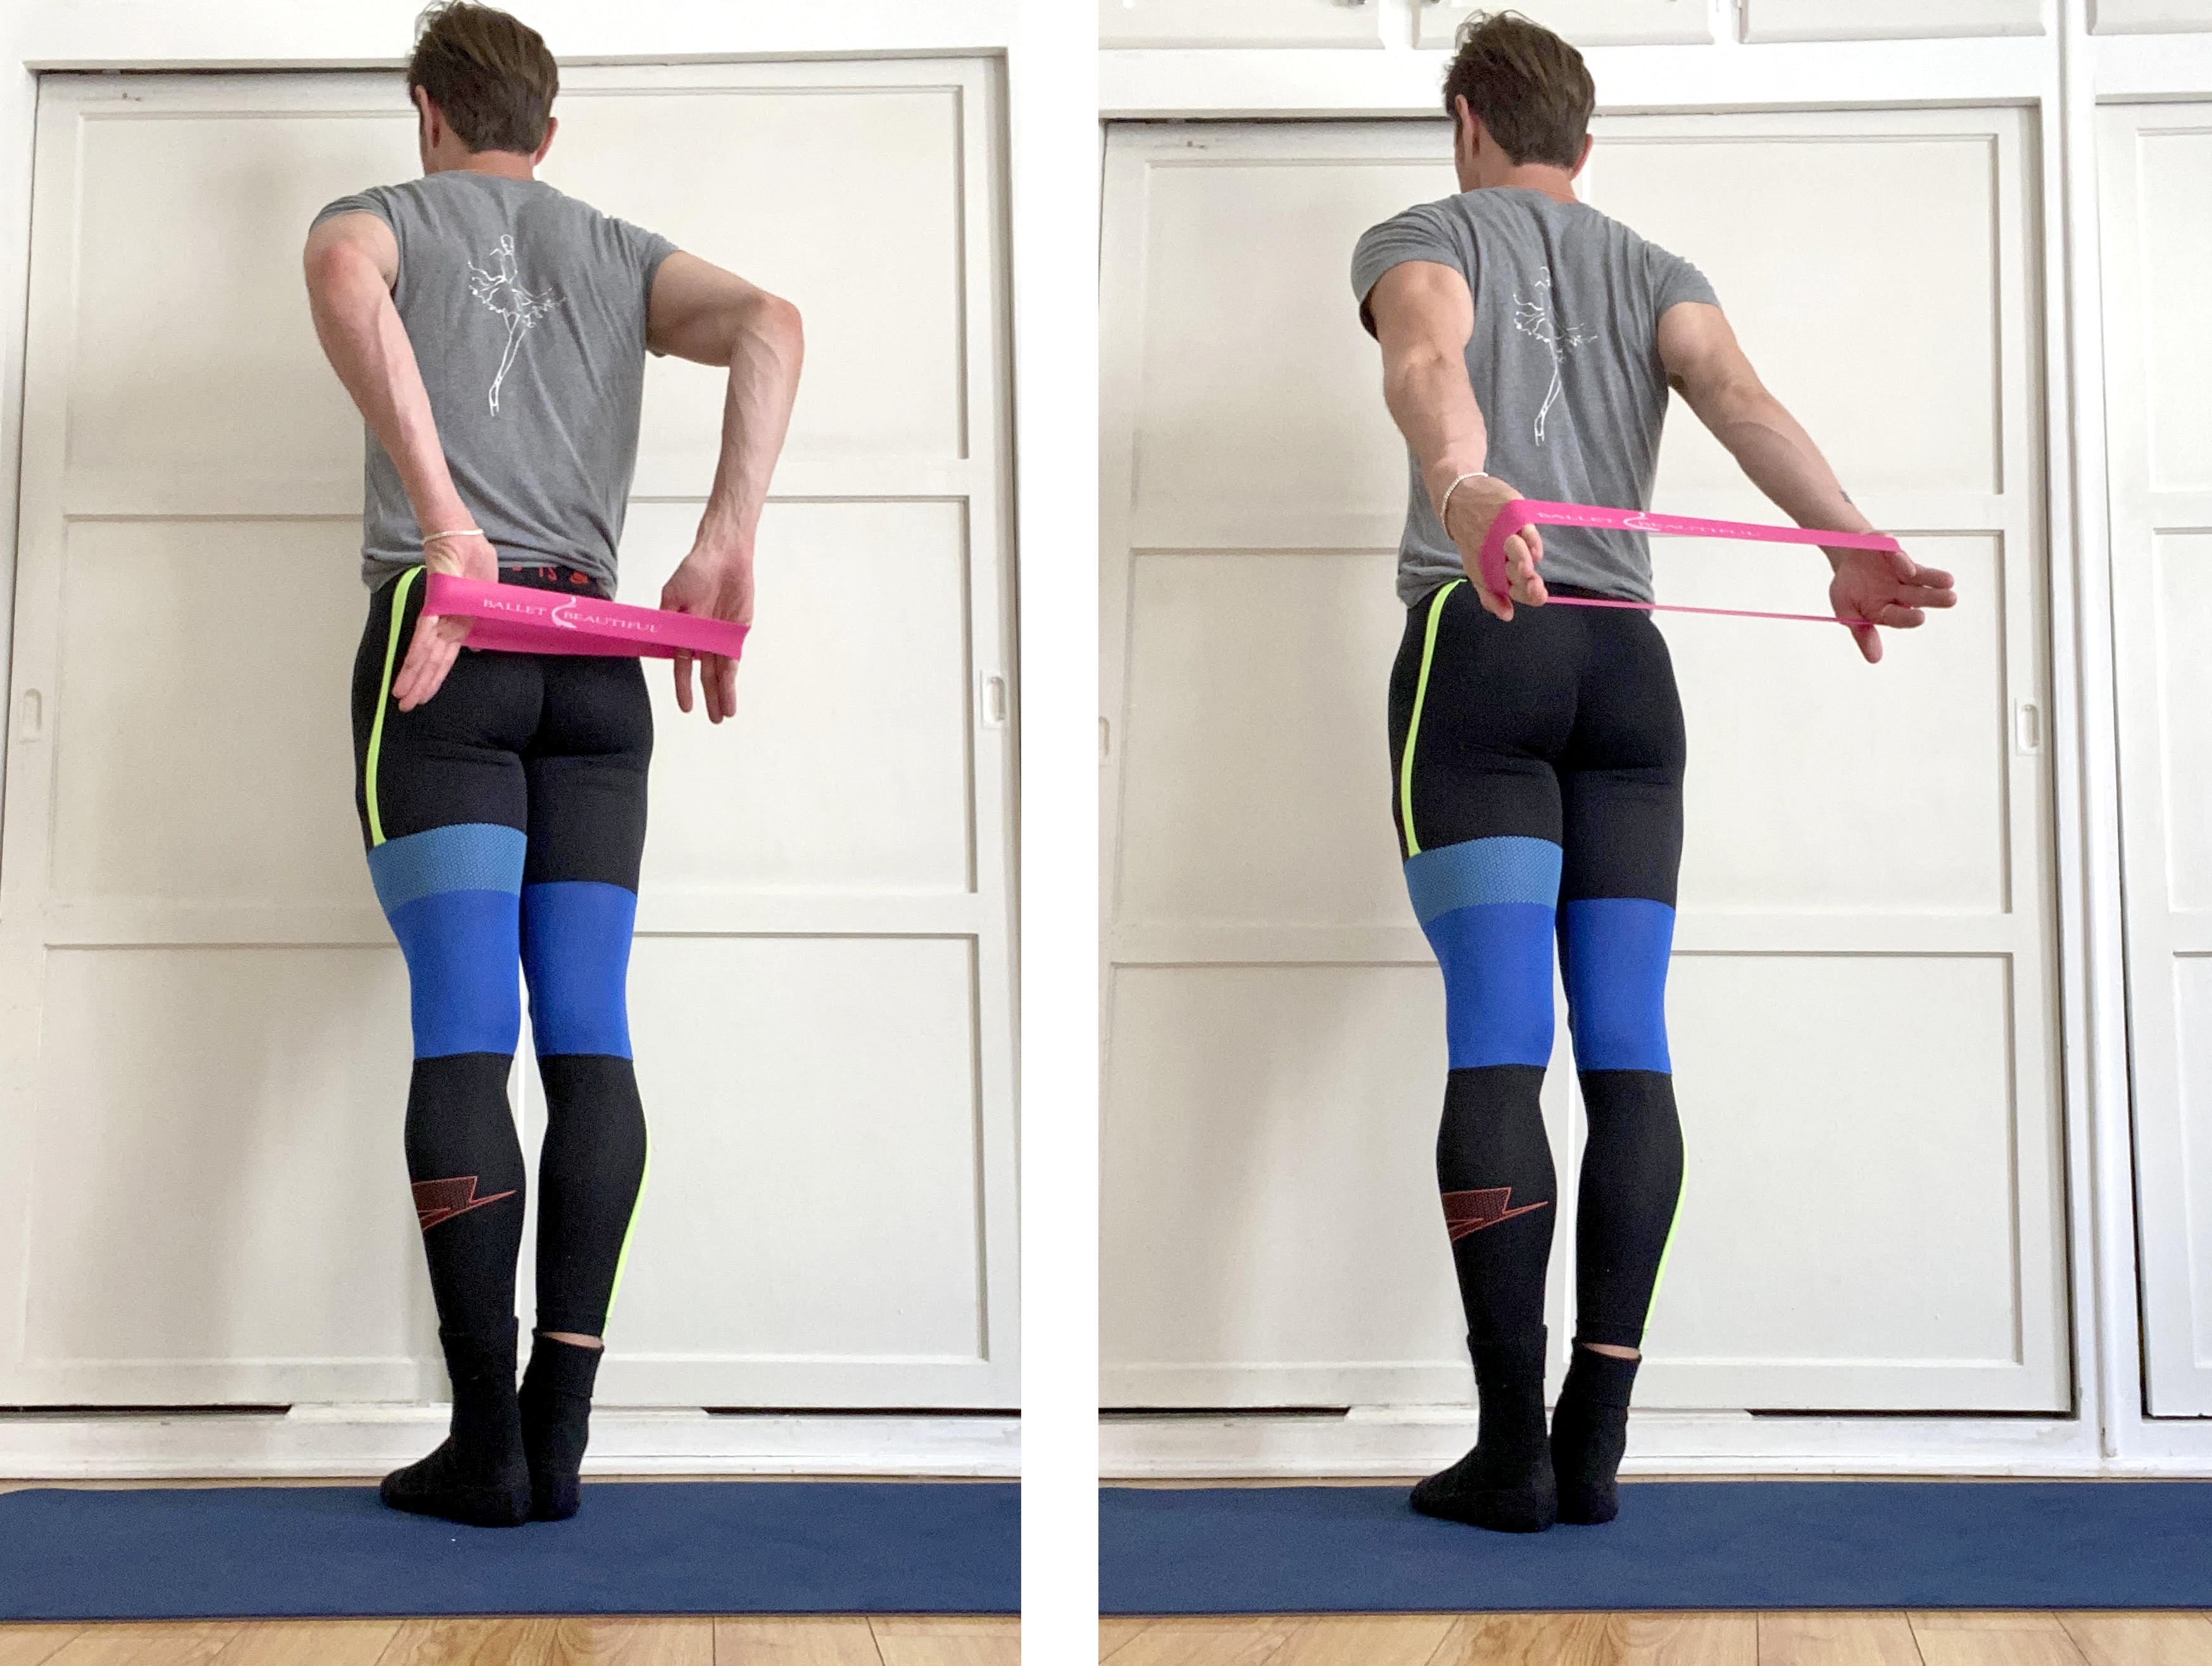
Arms
Using a band to target your arms is a fast way to achieve a quicker burn. To target the triceps, place both hands through the loop, stretching the hands out to the sides. In this position you can do pulses up/down, hands pulsing out to the side, bending the elbows and stretch the arms straight back.
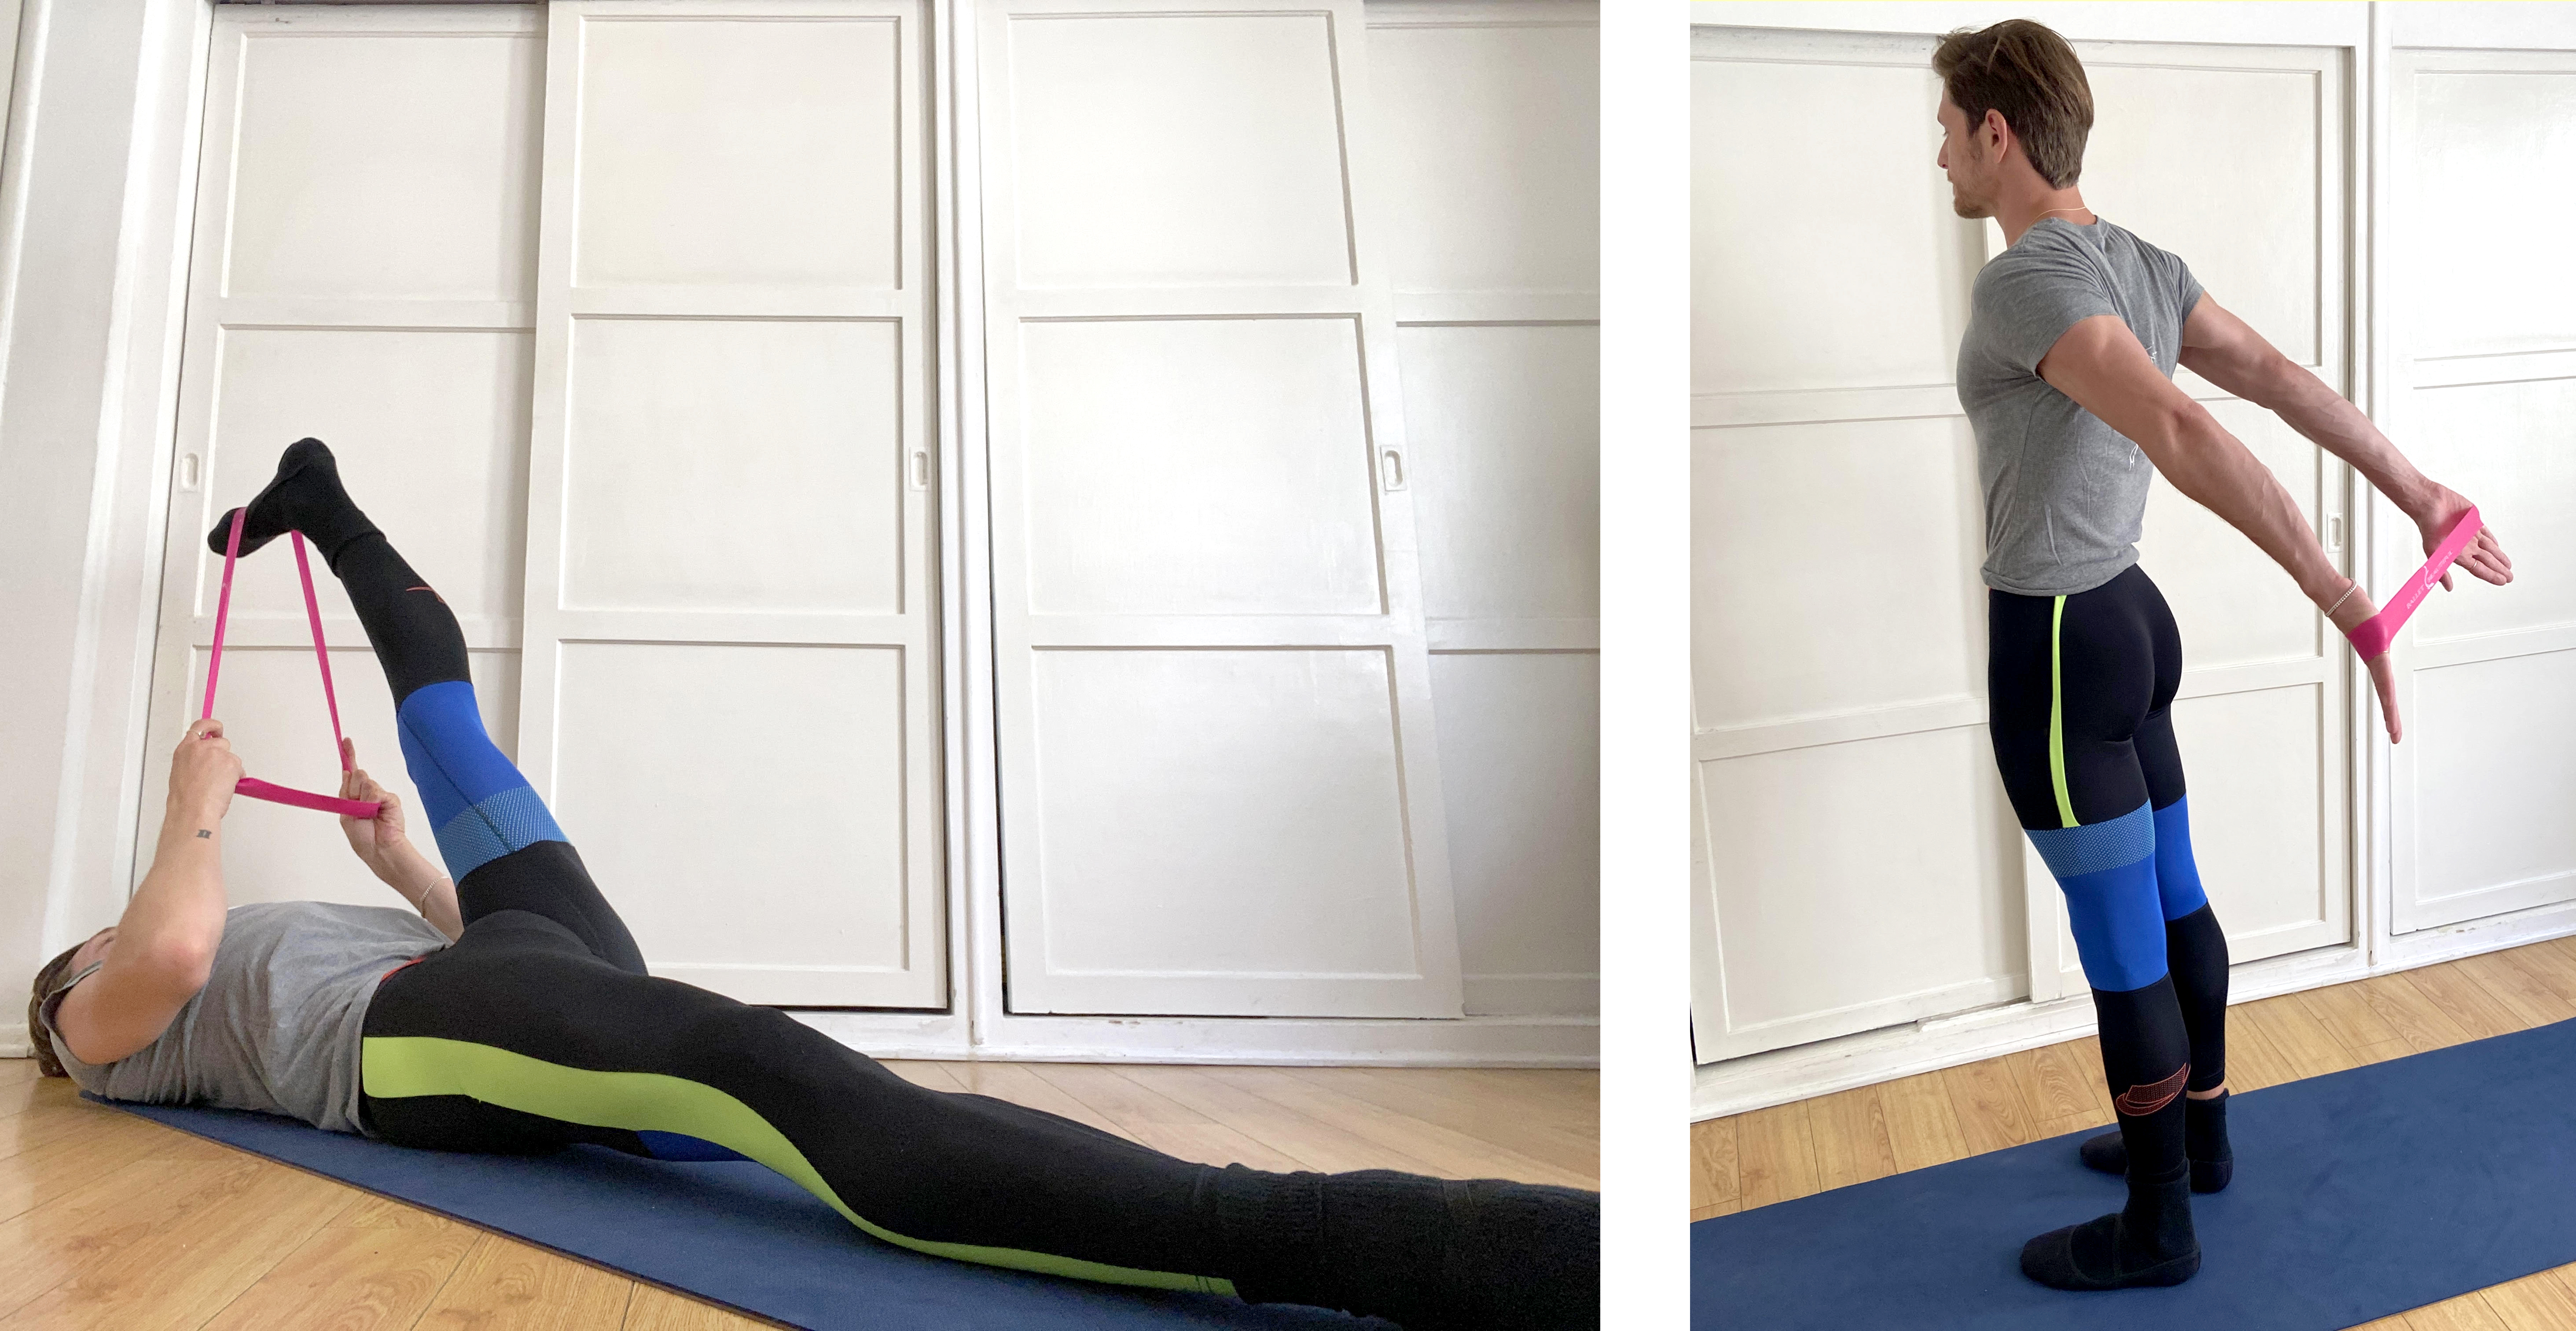
Stretches
You can use your resistance band as an accessory for stretching too! Some stretches that can be done using the bands are for the hamstrings, chest, shoulders and quads. Be careful when you’re using a band for stretches as it could easily snap back at you!
To stretch the hamstrings, there are two easy stretches. Start by laying down on your back, stretch one leg up, bring the leg to your chest, loop your band around the foot and stretch your leg to the ceiling. If that stretch is too intense, a more gentle way to stretch your hamstrings is to sit on the mat with your legs straight out in front of you. Take your band, loop it over both feet at the middle of your arch, and slowly pull back towards your body. To stretch your quad, have your band in one hand, bring one leg up behind, flex your foot, place the band on the top of your arch and pull your leg up towards your hips. To stretch your chest, simply take your band behind your back in both hands and pull your hands away from each other. If you want a shoulder stretch, take that same grip with the band, bend forward at your waist and allow your shoulders to go forward toward the floor.
In our training at Ballet Beautiful NYC, we love incorporating a looped resistance band for that added burn and tone. I can't wait to see you in our next Online Live Group Class!
Nicholas


You have brought up a very great details , thanks for the post.
https://fitbandsonline.com/